How to use React in Chrome extension Content Script?
Integrating React into Your Chrome Extension Content Script: A Step-by-Step Guide.

Good day, everyone!
I request the readers to patiently go through the complete blog. In case if you find any difficulties in following the blog, I have the source code for this boilerplate. Also, feel free to use the publication chat to raise your queries. Thanks in advance!
In this blog, we will be learning how to use React in your Chrome extension’s content script. Before moving on to the implementation we will look at the advantages of using React.
Component-based architecture
Large ecosystem - You can now use npm modules which can make your life easier
Virtual DOM: React uses a virtual DOM, which is a lightweight representation of the actual DOM.
Find the complete source code here
When should you use this approach?
You can use this approach when your content.js needs to render a complex UI inside a website’s DOM with a lot of state handling. If this is not the case, you can go with plain Vanilla JS.
Things we already know - A quick refresher
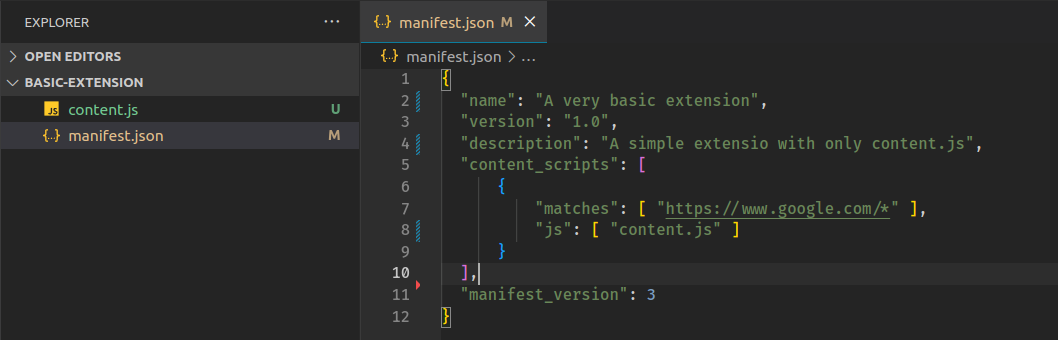
Final extension folder must contain a manifest.json file. It must have content_scripts configured with a content.js file.
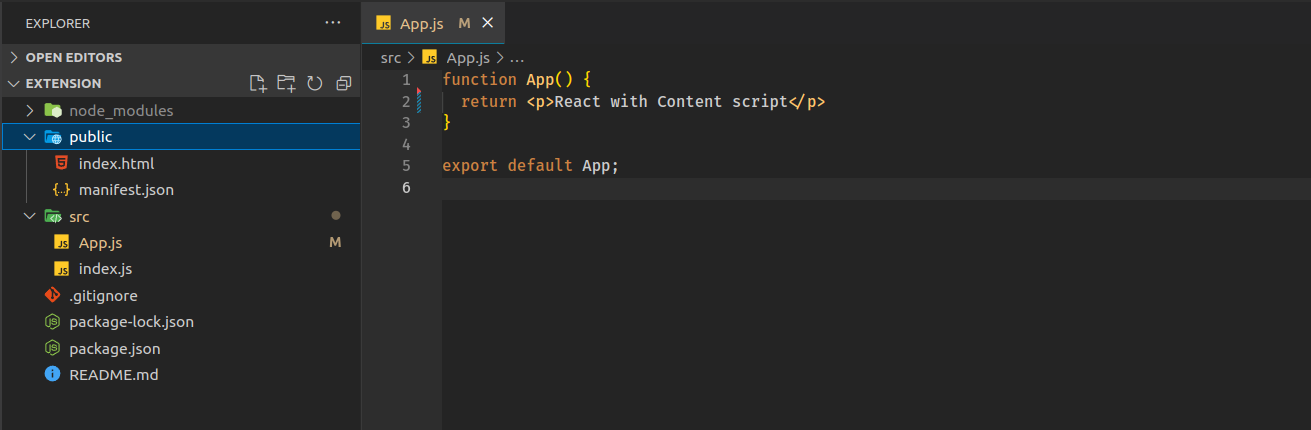
Inside the React app, you will see index.js, this file will render the whole react application inside a
div#rootwhich will be present inpublic/index.htmlIn React, all files that are present inside public will be copied to build when running
npm run build.Content_scripts are can be only javascript files. You cannot inject HTML elements inside content_scripts.
We will be using React’s create-react-app template to implement this
Our goal
Final extension folder should look something like this. Know How to build a Chrome extension
In this, content.js should be a react built Javascript file.
Step 1: Creating a react app using create-react-app
create-react-app is a command-line interface tool that automates the process of setting up a new React project. It is a popular and widely-used tool for creating new React applications quickly and easily, without the need for manual configuration and setup.
npx create-react-app extensionYou will now have a react app named “extension“. cd into the directory.
Step 2: Cleaning up unwanted files
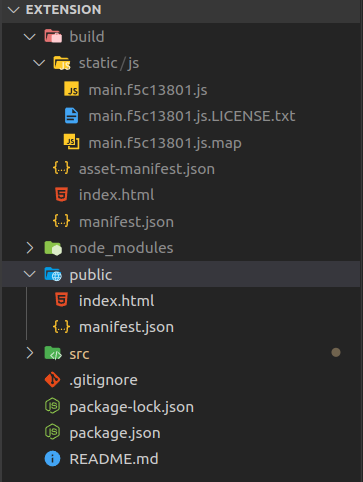
By default cra (create-react-app) creates few files. Remove the files which may seem unwanted to you. In my project, after cleaning up, the folder looks something like this
As you can see index.html and manifest.json got copied to the build folder. You can also see static/js/main.some_id.js file. This is where our whole react app is compiled and bundled into Javascript.
This Javascript file is linked to index.html by React. When you serve this index.html file, you can see your web app appear on the browser. This is how React apps are converted into Vanilla JS that browsers can understand.
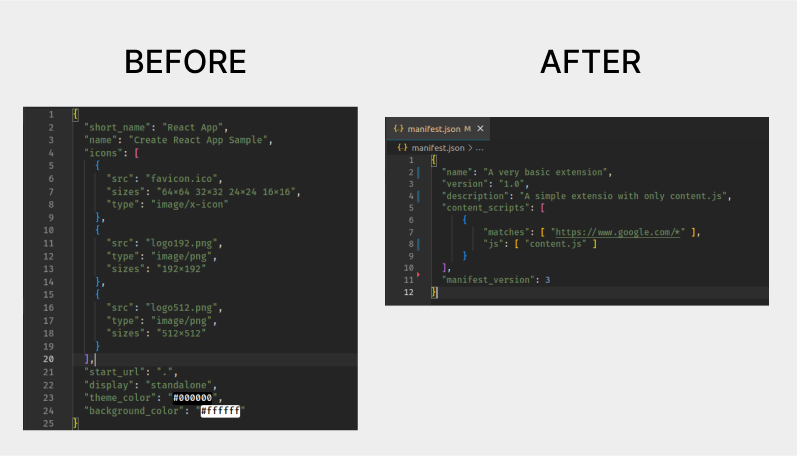
Step 3: Replacing manifest.json before building
By default, React app’s public folder has a manifest.json. Replace the contents with your extension’s manifest
Step 4: Run npm run build
In a React app,
npm run buildis a command that generates a production-ready build of your application.When you run this command, React creates a bundle of all the necessary files and assets, including HTML, CSS, JavaScript, and images, that are needed to run your app inside a build folder.
Important : When running
npm run buildwhatever files are present inside the public folder will be copied to the build folder. Runningnpm run buildevery time when you make a change to your project can be frustrating. Checkout this blog Triggering 'npm run build' on Save in React Projects for Chrome Extensions
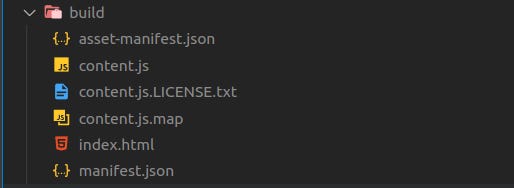
After running npm run build, the build folder will look something like this
To confirm that the whole react app will be put inside div#root, open main.some_id.js file and search for document.getElementById(“root“). Refer the image below
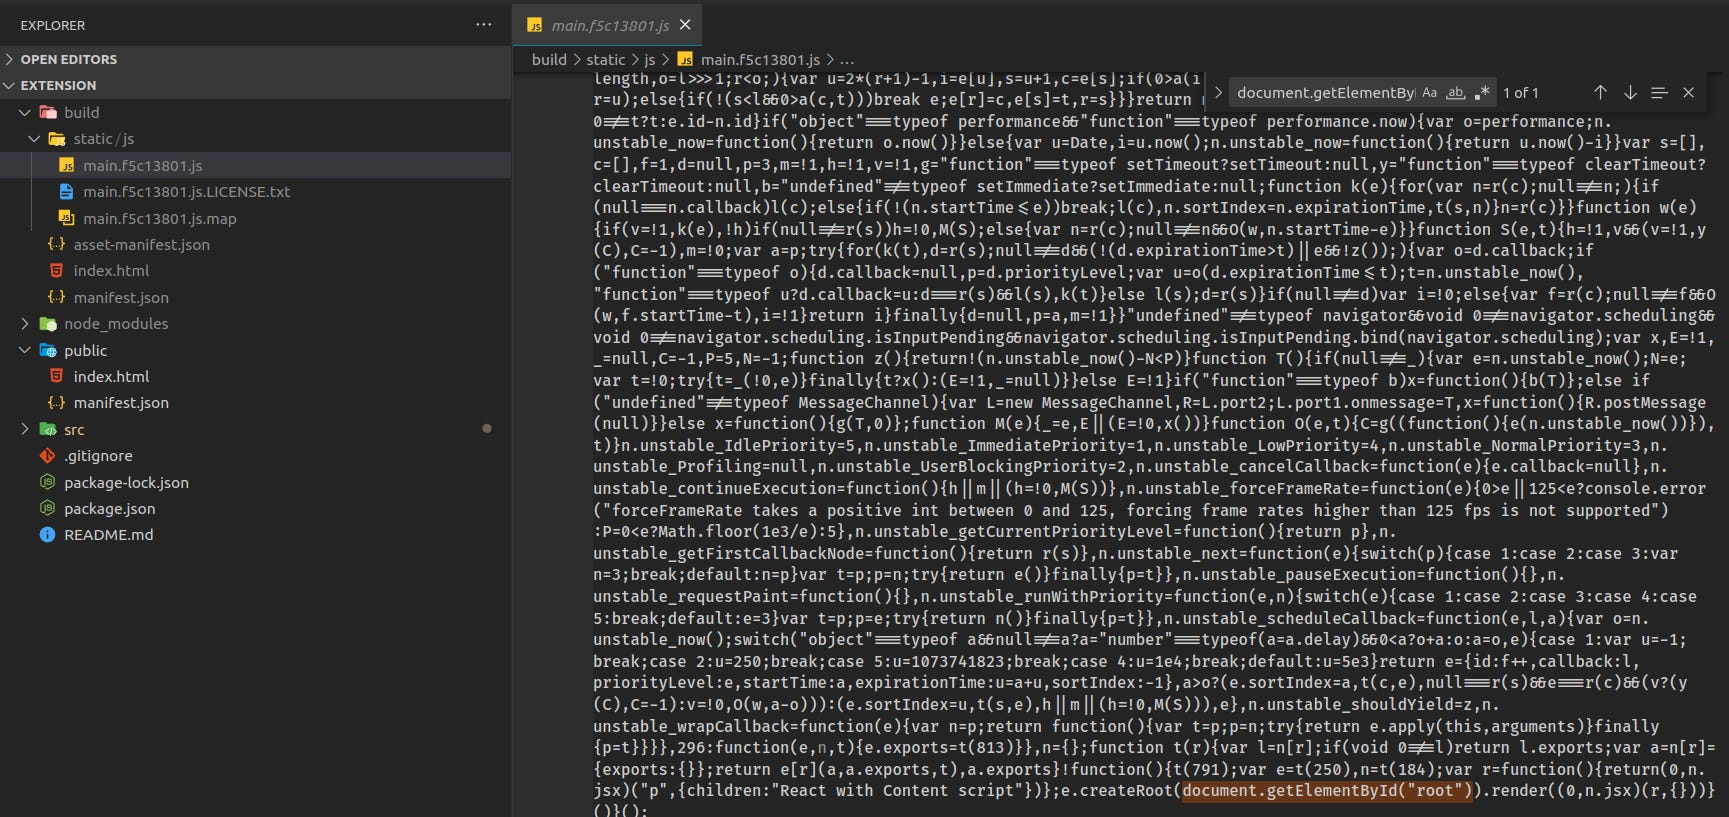
In our case, this main.some_id.js file is going to be our content.js and build folder is going to be our extension folder
Step 5: What after build?
Our build folder will now be ready with a manifest.json file that we kept inside public folder.
The Bigger Problem:
Our manifest.json will look for content.js in the root directory, unfortunately it cannot find it because our content.js file lives inside
static > js > main.some_id.js.Temporary solution: Move the file from
static > jsto the root ofbuildfolder and rename it to content.js. It can also be annoying to rename and move the folder each time you build the project. Now load the extension (build folder) inside the browser.When you try to open the URL in which you are trying to inject the content.js. The content.js file will now look for a div with id root inside the DOM ie.
document.getElementById(“root“)which will not be present in the website DOM.
Problem 1 : Renaming and moving
Everytime we build the react app, the built javascript file will be put inside static > js > main.some_id.js.
Solution
To solve this we will be using a npm module called rewire. This allows you to rename the javascript file inside static > js and also change the output path.
Install the module as a development dependency
npm i rewire -DCreate a build file inside scripts folder
scripts > build.jsPaste the below code in build.js
const rewire = require('rewire');
const path = require('path');

// Pointing to file which we want to re-wire — this is original build script
const defaults = rewire('react-scripts/scripts/build.js');

// Getting configuration from original build script
let config = defaults.__get__('config');

// If we want to move build result into a different folder, we can do that!
// Please note: that should be an absolute path!
config.output.path = path.join(path.dirname(__dirname), 'build');

// If we want to rename resulting bundle file to not have hashes, we can do that!
config.output.filename = 'content.js';

// And the last thing: disabling splitting
config.optimization.splitChunks = {
    cacheGroups: {
        default: false,
    },
};
config.optimization.runtimeChunk = false;
In the above code, you can see I’m changing the output path and output filename.
Inside package.json change the build script from react-scripts build to node scripts/index.js
"scripts": {
    "start": "react-scripts start",
    "build": "react-scripts build", // from this
    "test": "react-scripts test",
    "eject": "react-scripts eject"
  }

"scripts": {
    "start": "react-scripts start",
    "build": "node scripts/build.js", // to this
    "test": "react-scripts test",
    "eject": "react-scripts eject"
  },
Now when you run npm run build, the whole react app will be put inside build>content.js. The build folder will look something like this

When your’e shifting the app to production, you can remove the asset-manifest.json, content.js.LICENCE.txt and content.js.map files.
Problem 2: Target DOM element to inject the content UI
const root = ReactDOM.createRoot(document.getElementById('root'))
// index.js
This line of code inside index.js looks for a div with id root and renders the whole react app inside this element. This element is usually present inside public > index.html.
This index.html now becomes useless as we already know content_scripts cannot inject html files.
Solution
To solve this, we will be injecting a container to hold our react app using another content_scripts. This container will be appended as a child to our DOM target element. I know, this can be a little tricky. Trust me, after this you will be saving a lot of time.
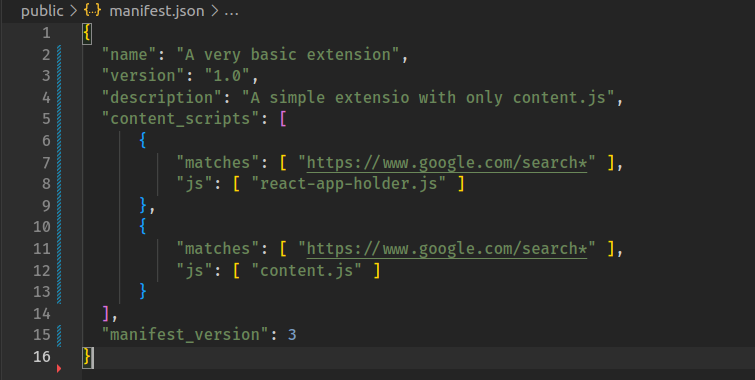
After adding the holder script, the manifest should look something like this
// react-app-holder.js
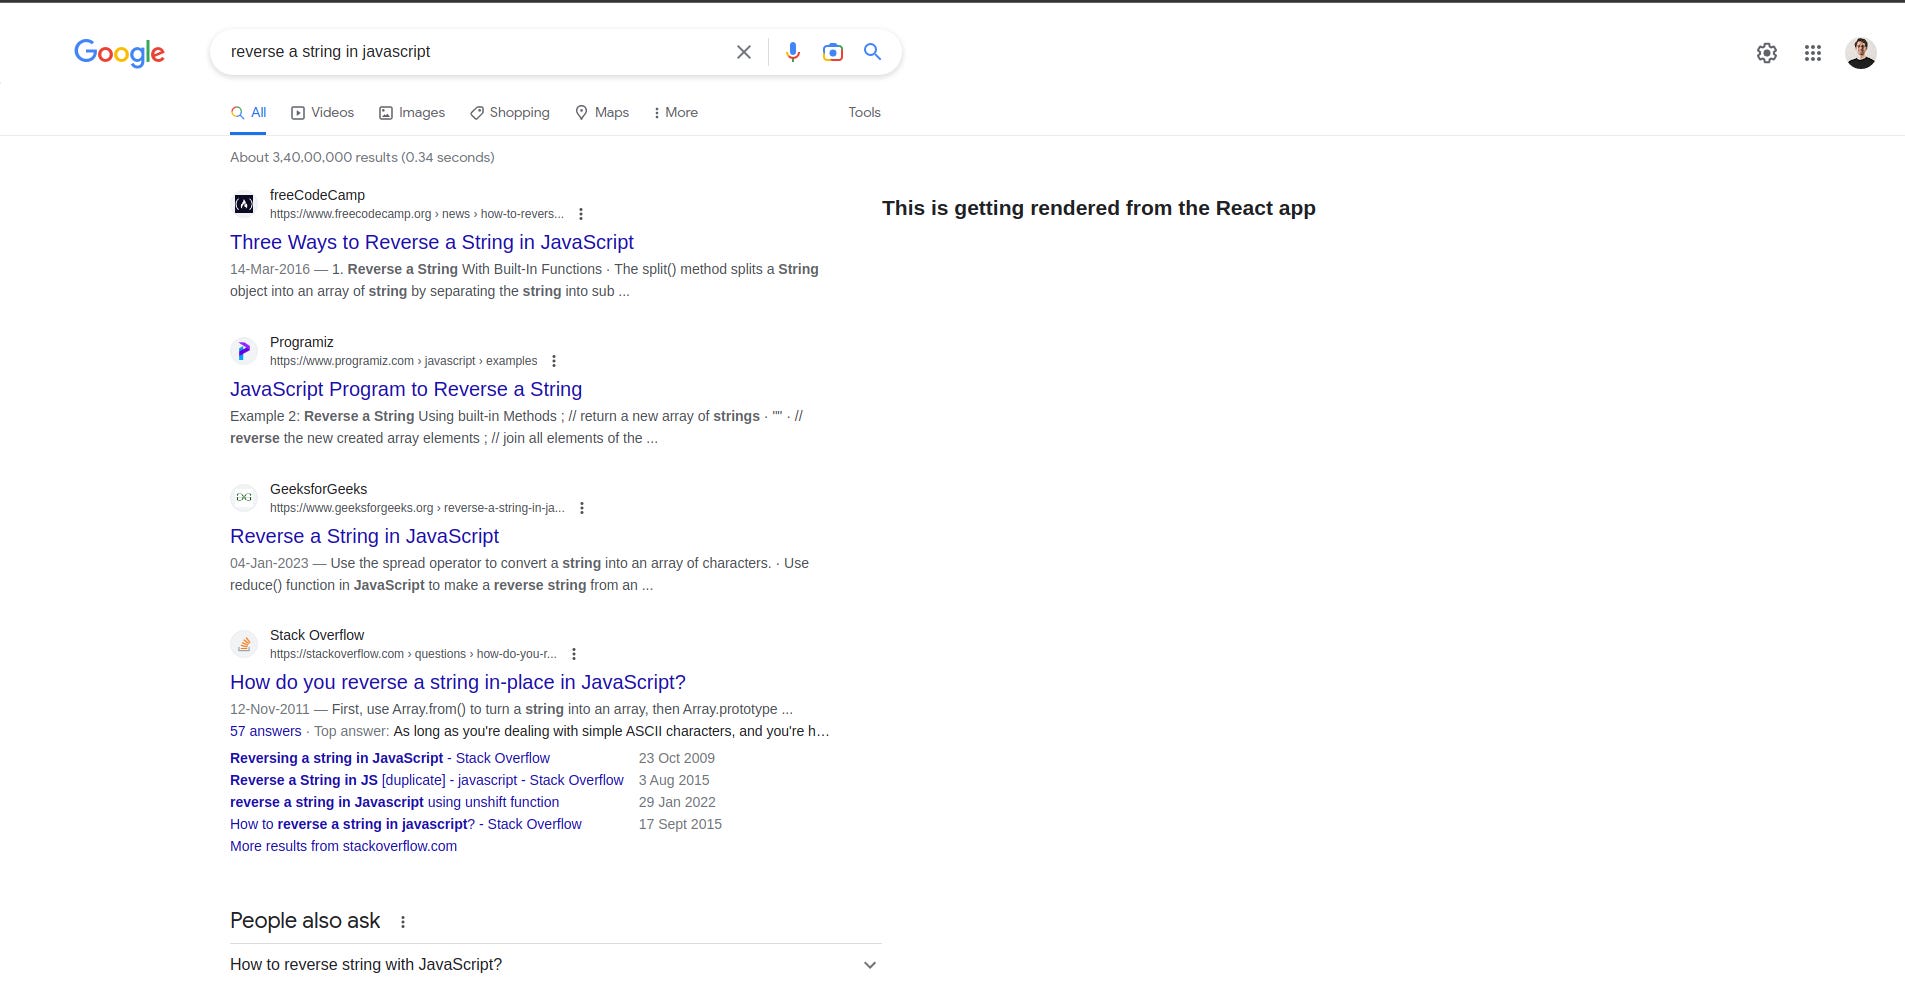
let targetDOMElement = document.getElementById("rcnt")
// rcnt - a div inside google.com/search* with id rcnt
let container = document.createElement("container")
container.setAttribute("id", "my-app-container")
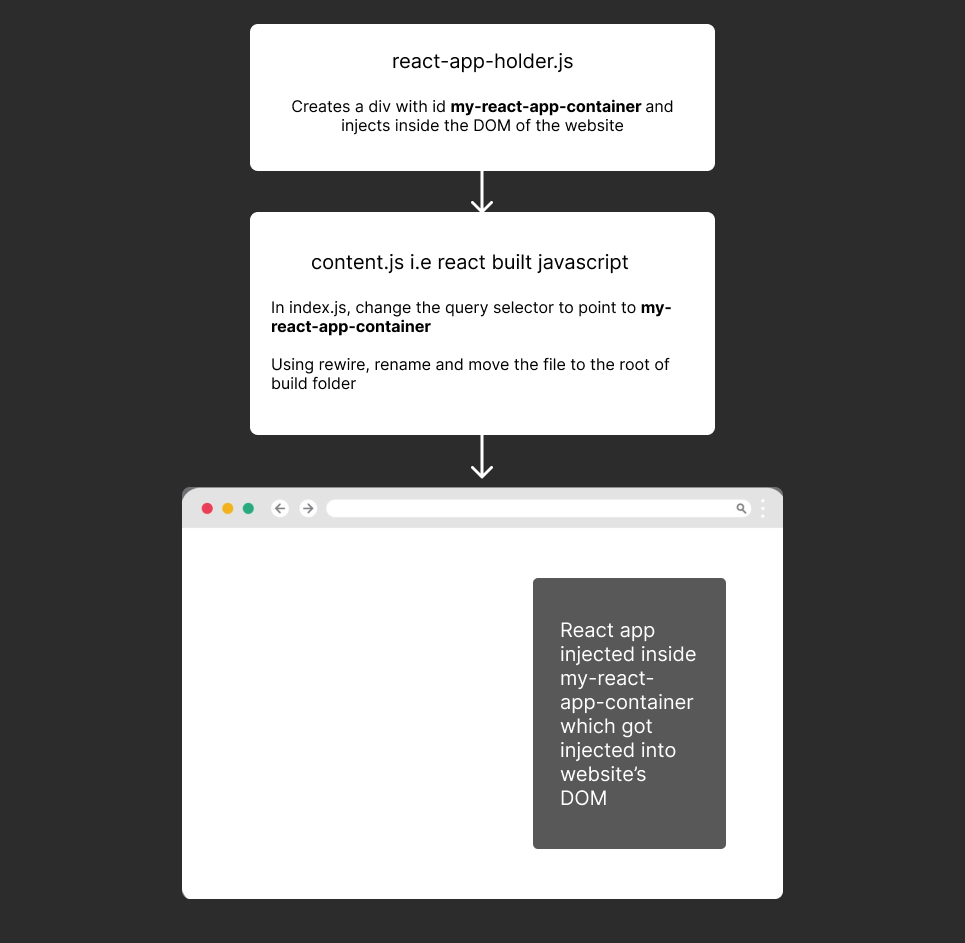
targetDOMElement.appendChild(container) I’m creating a holder to hold our react app and this holder gets injected inside the website’s target element. react-app-holder.js this file creates a container for our react app to fit in and this container has the id my-app-container.
In index.js, update the selector to point to the container id that we created in the previous step,
const root = ReactDOM.createRoot(document.getElementById('my-app-container'))
// index.js
Now our react app will inject the app inside this container.
A high level overview
Conclusion
Thank you for reading through the blog patiently. Feel free to use the publication chat to raise your queries. Use this source code to better understand how to achieve this. The output of the source code will look like this